
Save Authenticating Document as a PDF File in Adobe Acrobat or Reader
Jump to sections:
- Adobe Acrobat
- Adobe Reader
- Submit your notarized form ID authenticating document (and for COVID relief)
To upload your signed and notarized authenticating document to EDGAR, you must first scan and save the document as a PDF file.
Follow these steps to save your authenticating document as a PDF file using Adobe Acrobat.
1. Open the file in Adobe Acrobat Pro/DC, click on File, and select Print.
2. Select Adobe PDF from the printer list, and then select Advanced.
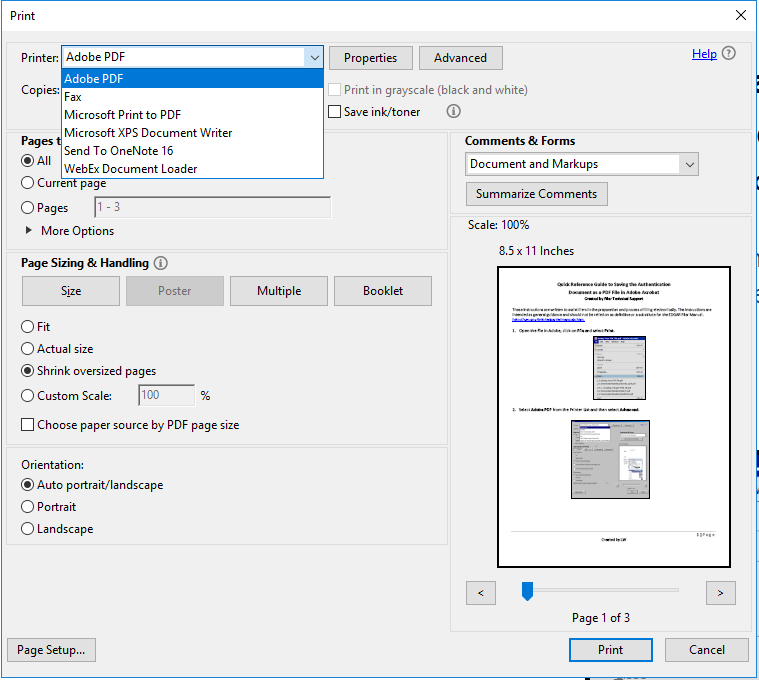
3. In Advanced Print Setup, click the box next to Print As Image and select OK.
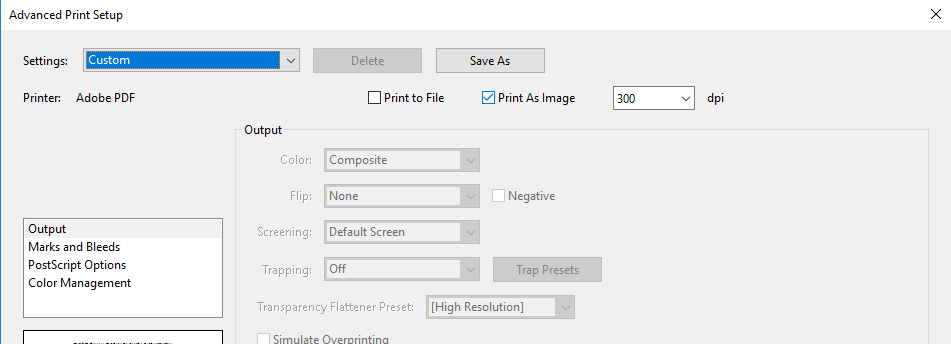
Please note that the location of the Advanced button depends on the version of Acrobat.
4. Select Print.
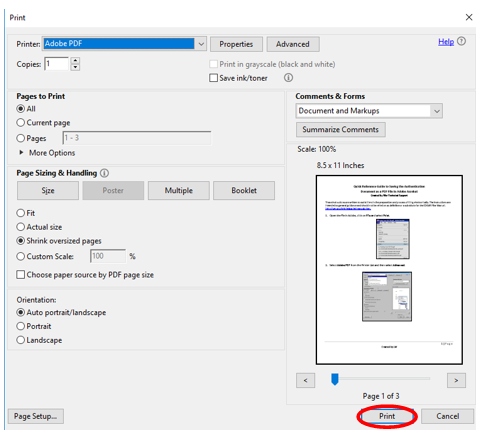
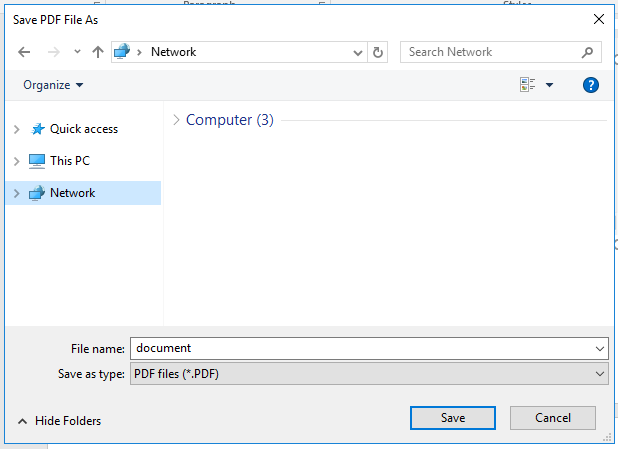
5. A Save PDF File As and a Progress window will appear. Rename and save your file as an Adobe PDF, keeping in mind the following file name restrictions:
- 32 characters or less, including the file extension;
- All characters must be lowercase;
- File name must start with a letter;
- No spaces in the file name;
- It may contain digits 0-9; and It may have up to one period (.), one hyphen (-), and one underscore character (_).
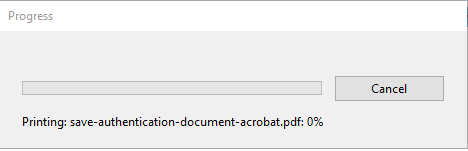
6. When the Progress window reaches 100%, the window will disappear.
7. Exit Adobe Acrobat, and go to the EDGAR Filer Management website. See Return to your Form ID application to add your authenticating document below.
Follow these steps to save your authenticating document as a PDF file using Adobe Reader.
1. Open the file in Adobe Reader, select Edit and Take a Snapshot.
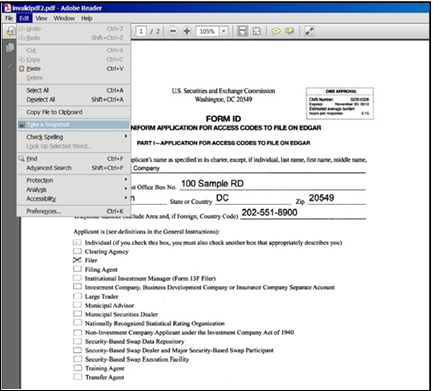
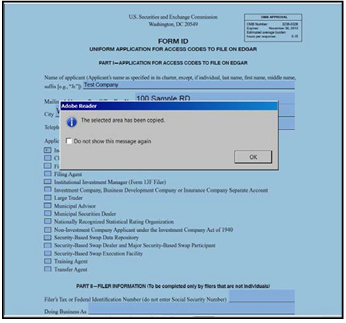
2. Click in the form on the first page and a snapshot will be taken of that page. You will receive a message that the area has been copied.
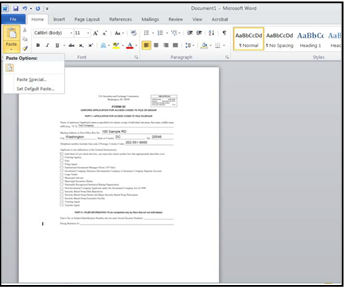
3. Open Microsoft Word and Select File, then Paste. The first page will appear in Word.
4. Go back to Adobe Reader and repeat Step 2 on the second page. Paste the second page into Word after the first page.

5. Save the file as an Adobe PDF, keeping in mind the following file name restrictions:
- 32 characters or less, including the file extension;
- All characters must be lowercase;
- File name must start with a letter;
- No spaces in the file name; It may contain digits 0-9; and
- It may have up to one period (.), one hyphen (-), and one underscore character (_).
6. Exit Adobe Reader, and go to the EDGAR Filer Management website.
Return to the Form ID application. Select “Continue with Saved Application for EDGAR Access” to retrieve your saved Form ID application. Select the Documents tab and upload the scanned PDF. Select CORRESP for Type. Click Submit.
Submitting Your Notarized Form ID Authenticating Document Under Interim Temporary Final Rule 10(c)—the COVID-19 Relief Process?
PLEASE NOTE--temporary final Rule 10(c) has expired.
Follow these steps if you’ve already been granted EDGAR access, but now need to submit your notarized authenticating document.
- Scan and save the notarized authenticating document as a PDF file.
- Log in to the EDGAR Filing Website using your CIK and password.
- From the left side menu, click on the EDGARLink Online Form Submission link.
- To the right of the page, find the Submission Types field and select CORRESP. Click the Go to Form button.
- Type in your CIK and CCC in the Main Tab. In the Documents tab, select Add Document button > select Browse in the pop-up screen and select the notarized Form ID PDF file you want to upload > select Upload Attachment. When document is attached, select CORRESP in the drop-down list.
- In addition to the notarized Form ID in PDF format, please include a cover letter in text format. Select Add Document button > select Browse in the pop-up screen > select the cover letter text file you want to upload > select Upload Attachment. When document is attached, select CORRESP in the drop-down list, then click Submit.
DO NOT include your CCC in the cover letter.
| Jump to sections: |
| • Adobe Acrobat |
| • Adobe Reader |
| • Submit your notarized Form ID authenticating document (and for COVID relief) |
Last Reviewed or Updated: April 23, 2025