

Attach and Submit a Filing Through the EDGAR Filing Website
June 4, 2024
NOTE: This guidance applies to documents submitted through the EDGAR Filing website. For information regarding submitting documents through the EDGAR submission API, please consult the Overview of EDGAR APIs and the API Development Toolkit.
After creating your ASCII (text) and/or HTML document(s), log in to the EDGAR Filing website to attach and submit the document(s).
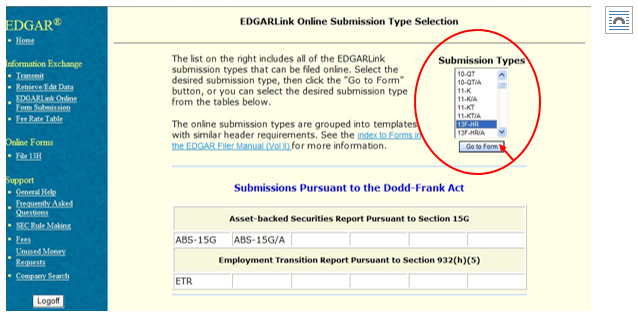
From the left navigation column, click on the EDGARLink Online Form Submission link.
- To the right of the page, find the Submission Types field and select the relevant submission type(s). Click the Go to Form button.
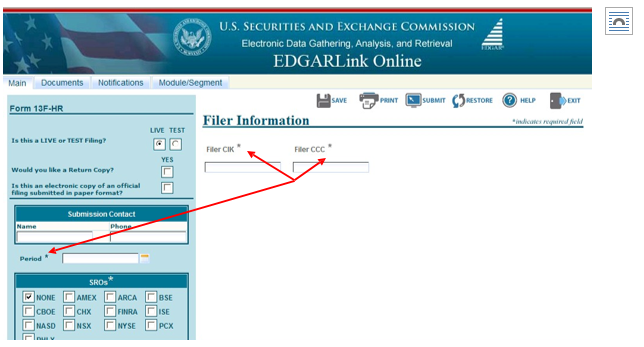
- Fill in the required information (CIK, CCC, Submission Type, and Period) and any optional fields relevant to your submission. Required fields are marked with an asterisk (*).
- Click on the Documents tab at upper left. On the Documents page, add your document(s) by clicking on the Add Document button > choose Attachments > browse for your file > select Open.
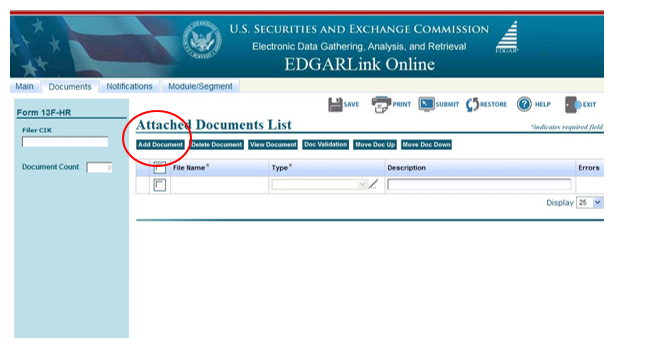
The name of your file will appear in the File Name field. You must identify the type of document in the Type field (e.g., 10-Q, 10-K, SC 13G, etc.).
Repeat the instructions above to attach additional documents.
At the top of the Documents page, you may also select View Document to view a document you have attached and Delete Document to delete a document you have attached.
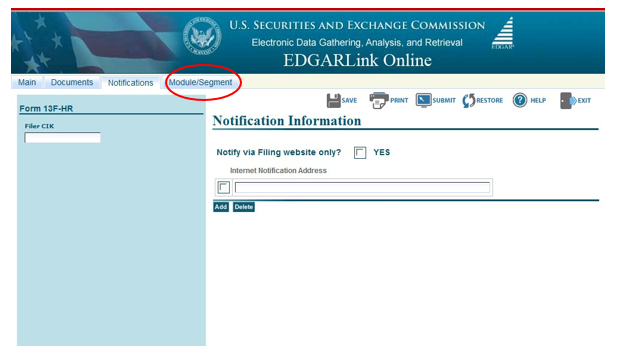
You may add multiple email addresses where you would like notification messages sent (e.g., message that submission was accepted or suspended).
To do so:- Click the Notifications tab to add email addresses.
- Enter the email address of anyone you would like to receive notice of the status of your filing.
Note that after you submit your filing, EDGAR will automatically send notification messages to the email addresses associated with the Login CIK, Submission Contact, and Primary Issuer (if applicable).
Use the Module/Segment tab if you wish to prepare or reference module or segment documents.
EDGAR treats module and segment documents as your private information and stores them in the non-public data storage area of EDGAR according to your CIK. Module/segment storage allows you to copy information to your subsequent filings so you do not have to resubmit the same data each time.
You should submit modules/segments using uppercase letters and numerals. You should subsequently reference these modules and segments in the same uppercase format as initially submitted. A module/segment can be used either as a Type 1 reference within a document or as a Type 2 reference listed on the Modules/Segments page of the EDGARLink Online submissions.
Further instruction regarding modules and segments can be found in the EDGAR Filer Manual, Volume II, Preparing or Referencing Module and Segment Documents.
- Validate your attachment for errors by selecting the check box corresponding to the attachment and clicking on the Document Validation button.
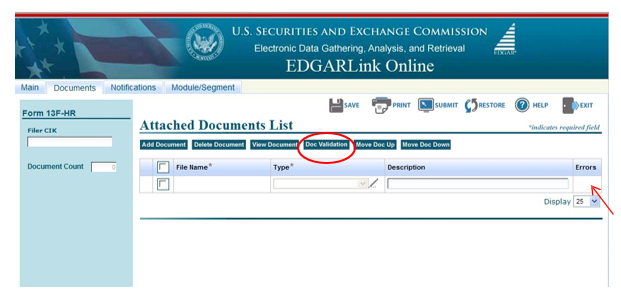
If errors are found after validation is performed, EDGARLink Online displays the number of errors in the Errors field on the far right of the Attached Documents List page. Click the value in the Errors field of each validated document to view validation errors (if any).
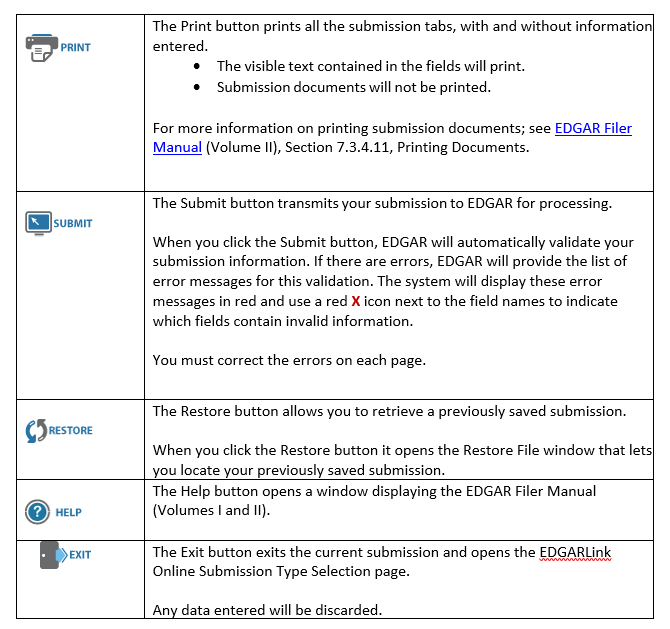
NOTE: Review your filing before submitting it. Once a filing is submitted, EDGAR may accept the filing and disseminate it immediately to the public. The SEC cannot rescind the dissemination or otherwise retrieve the filing. - Click the Submit button to submit your filing—this will transmit your submission to EDGAR for processing.
EDGAR will automatically validate your submission information. If there are errors, EDGAR will provide the list of error messages for the validation. Error messages will be shown in red and display a red X icon next to the field names to indicate which fields contain invalid information.
You must correct the errors on each page.
You may quickly determine if your filing was accepted or suspended by using the EDGAR Filing Website, or by referring to messages that EDGAR sends to your email address on file.
For further information, please review the EDGAR Filer Manual (Volume II), Section 7, Preparing and Transmitting EDGARLink Online Submissions.
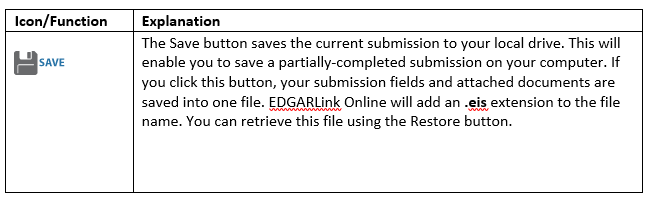
EDGARLink Online Tool Bar. EDGARLink Online features a tool bar—located in the upper block of the screen—to help you perform basic functions like save, restore, print, submit, exit, and view EDGARLink Online help.
Last Reviewed or Updated: Jan. 15, 2026